待望?のしっぽ穴付きパフスリーブワンピースが出来ました。
かなり前からあった要望で、フォロワーさんから依頼があり今回重すぎる腰を上げて作成してみました。
個人的には普通のパフスリーブワンピースのほうが好きですね~
コンテンツ
型紙
型紙ダウンロードフォームはこちら
※スカート以外の型紙は従来のパフスリーブワンピースの型紙を使用して下さい。
作り方解説
レシピですが、基本は以下のエントリを参照して下さい。
本記事ではスカート作成部分のみ解説します。

見返しを縫う
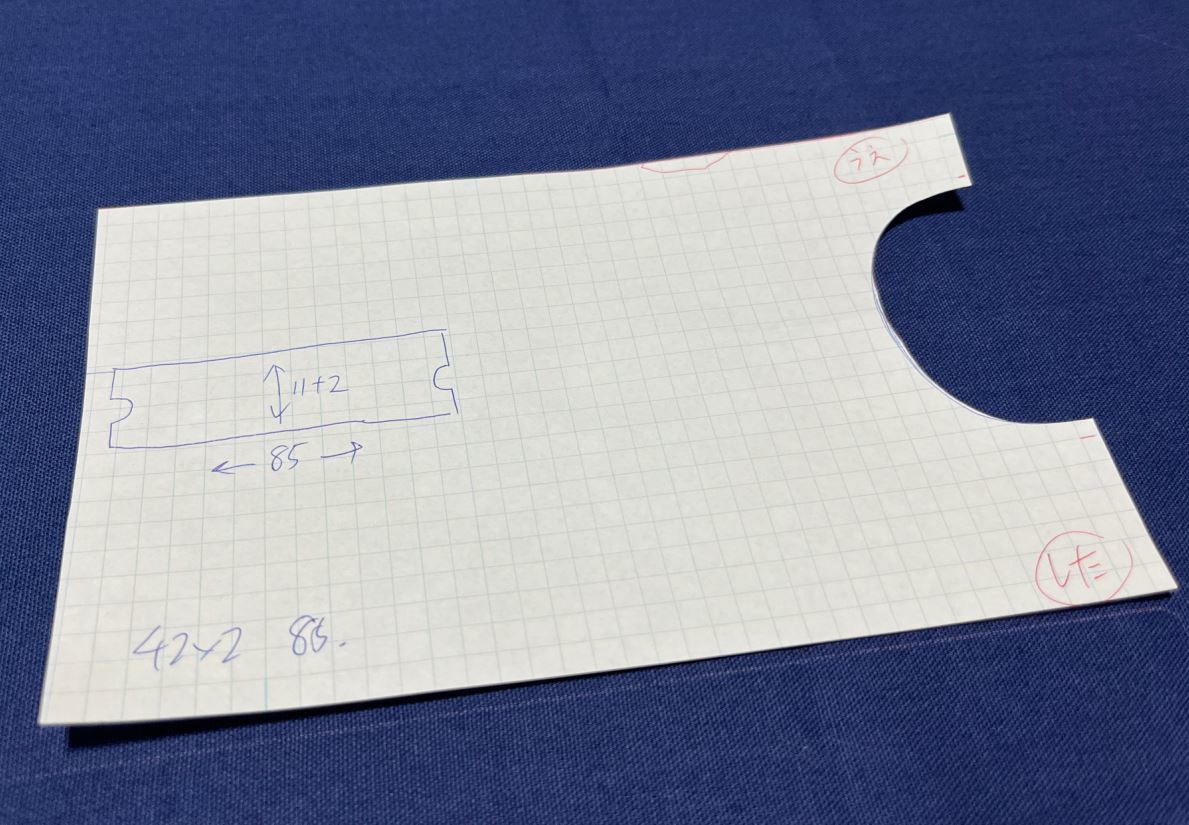
生地を裁断します。
本型紙は珍しく縫い代込みですので注意して下さい。
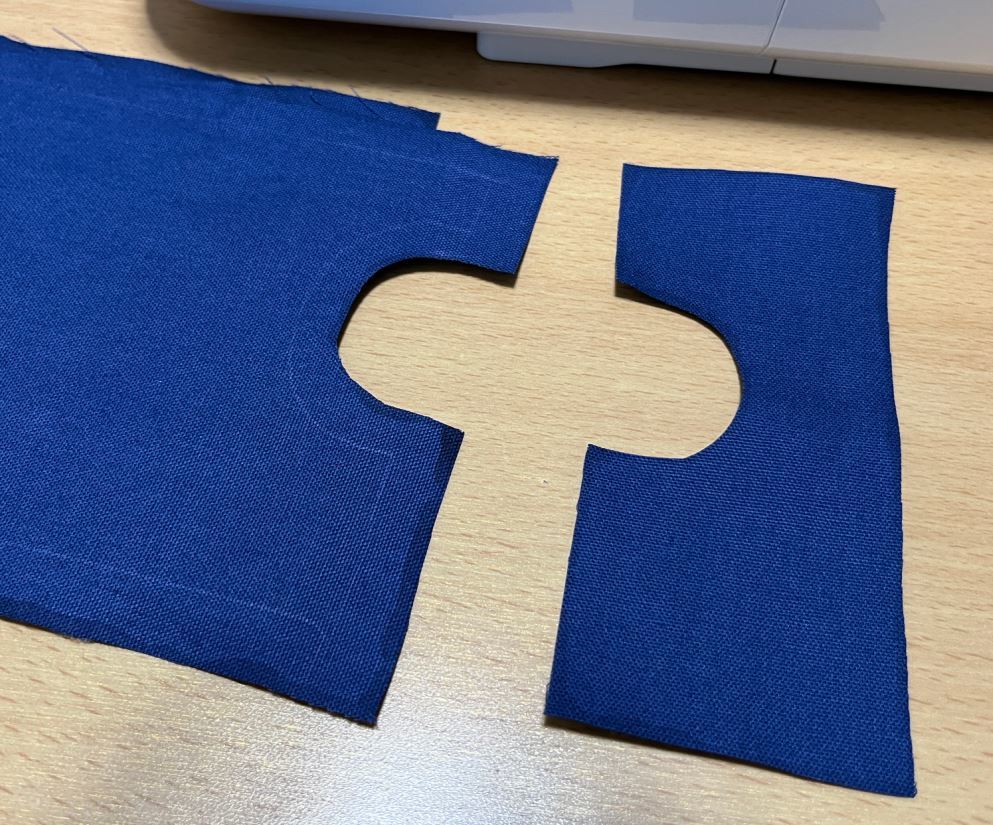
スカートと見返しを中表にし、縫い代1cmで縫い合わせます。
しっぽで隠れるので多少雑でも問題ないです。
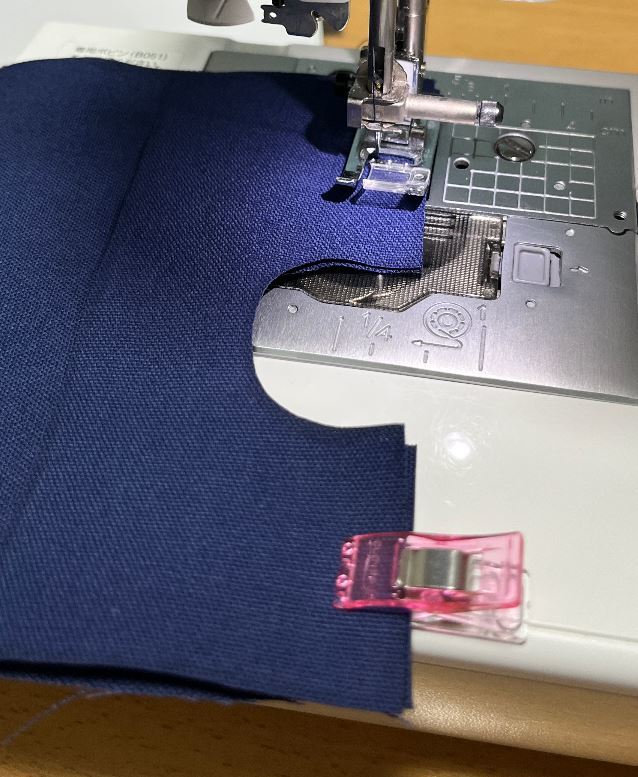
縫い終わりました。
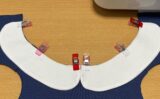
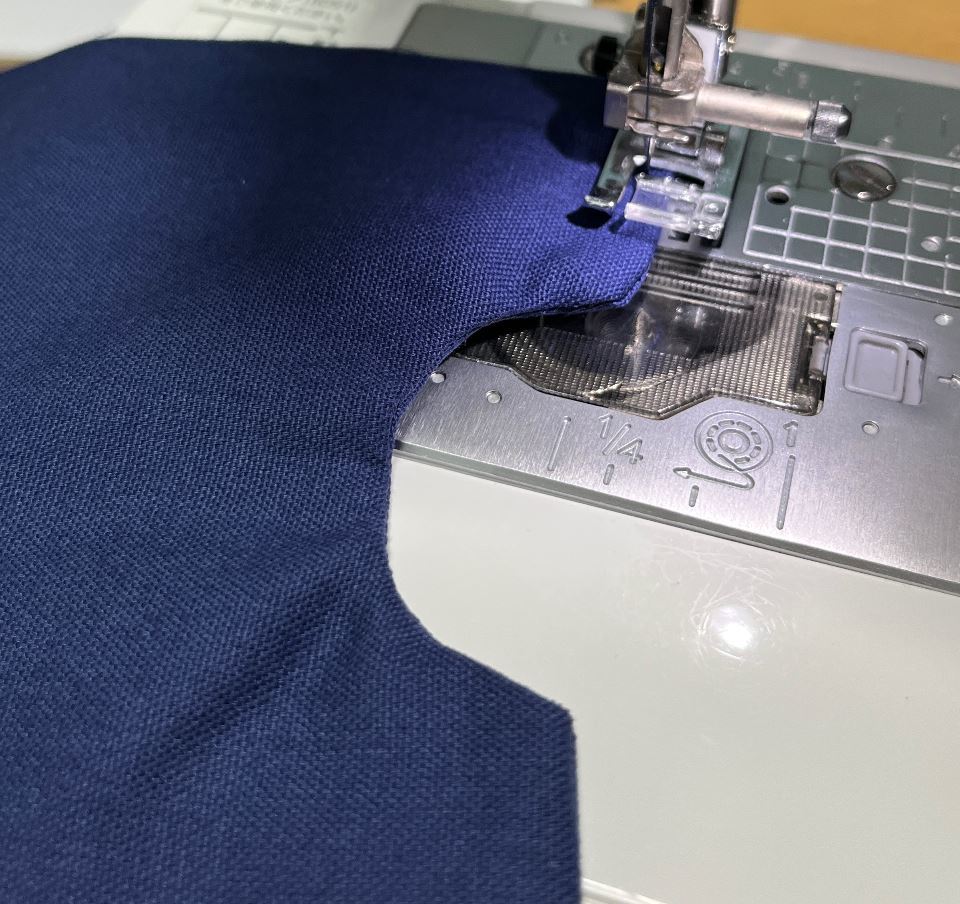
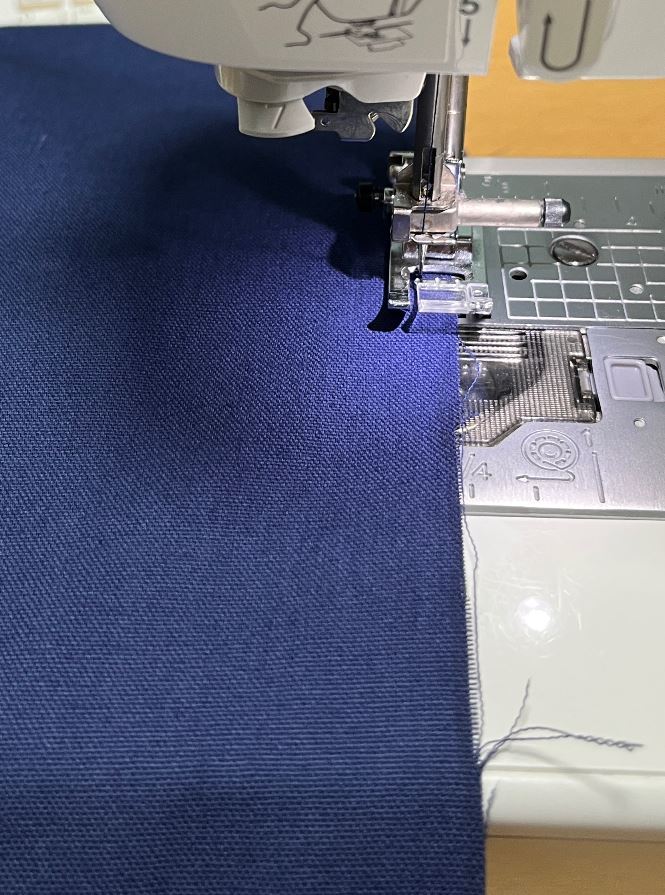
ちょっと見づらいですが、写真のようにミシンを掛けて下さい。
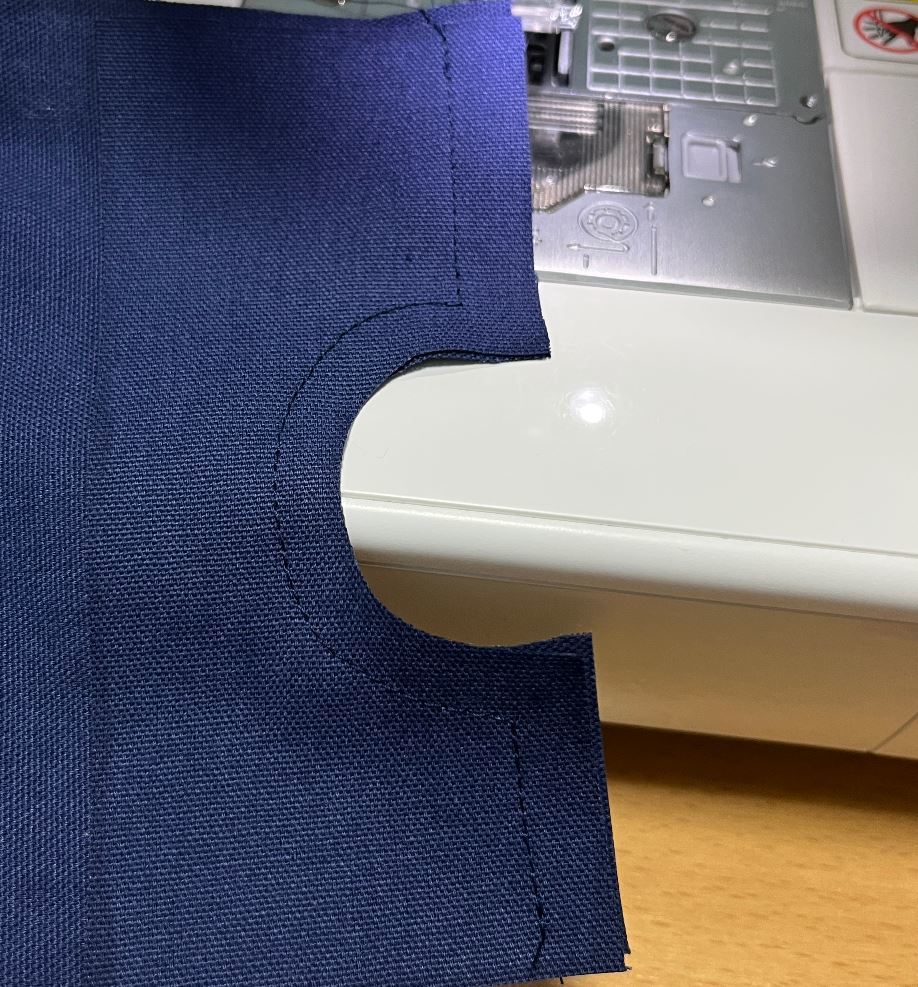
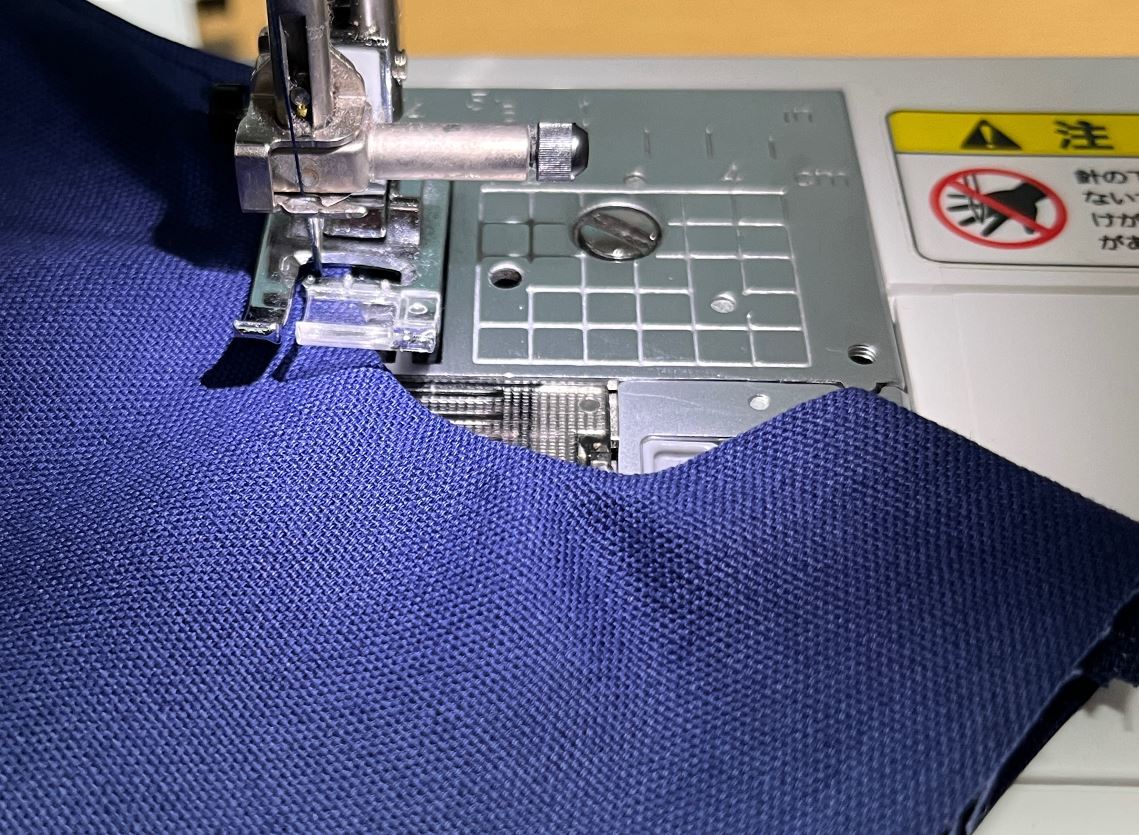
しっぽ穴周辺の角を切り落とします。
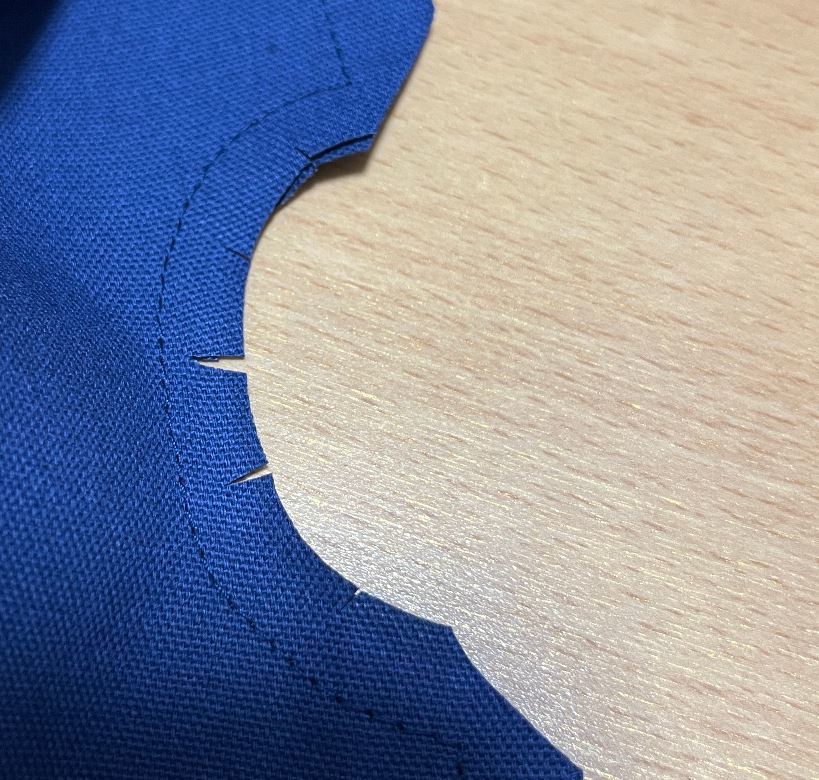
曲線部分に切り込みを入れておきます。
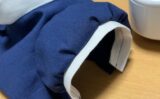
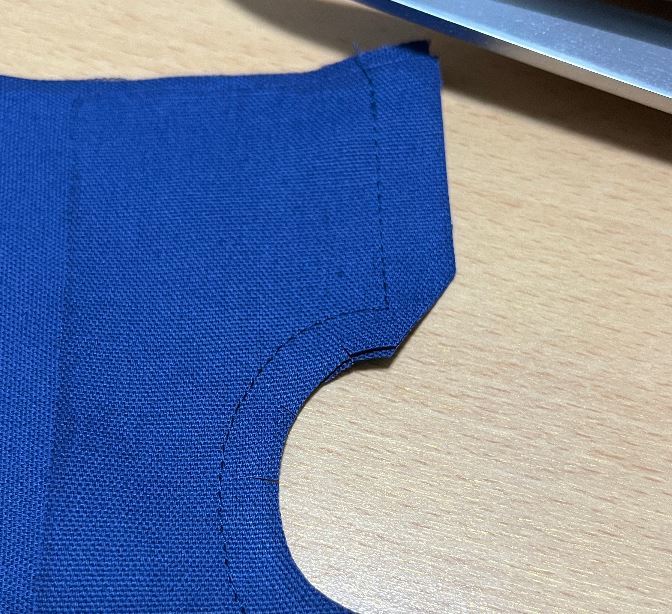
見返しをひっくり返して表にします。
そして、表からミシンを3mm程度で掛けます。
曲線部分はゆっくり縫いましょう。
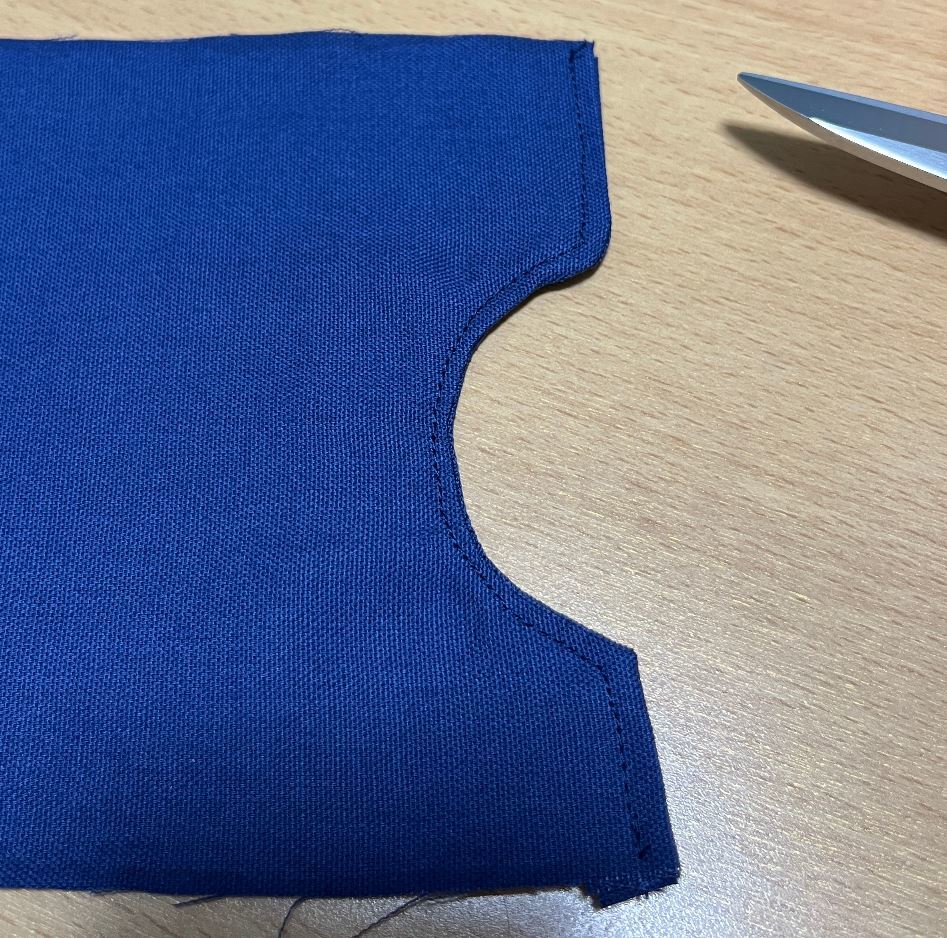
縫い終わるとこうなります。
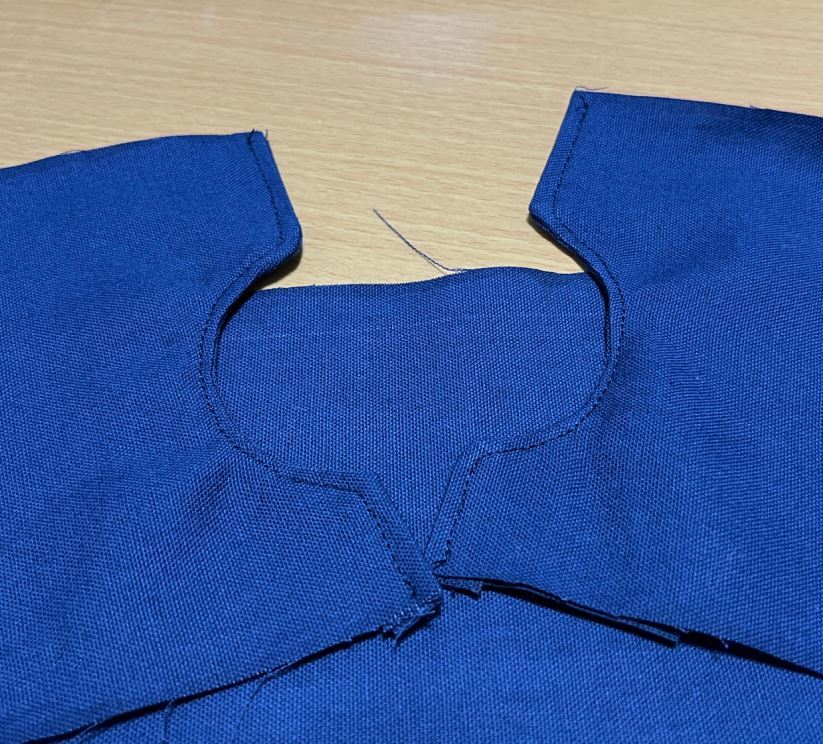
スカートの両端について同じ作業をします。
レースを付ける
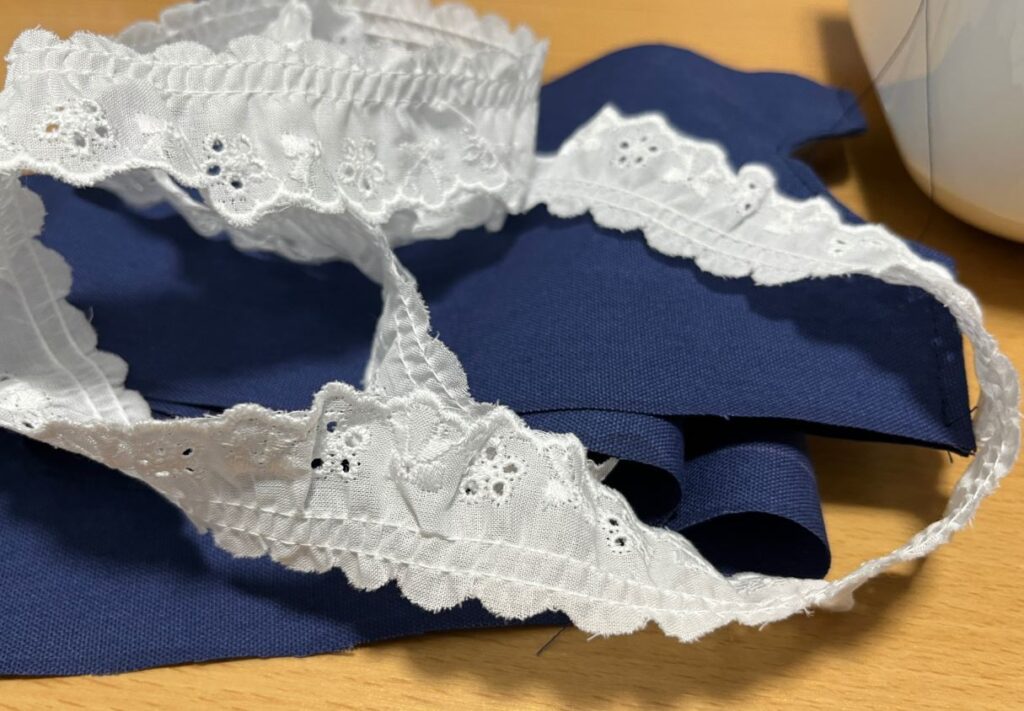
レースを縫い付けます。
お好きなものを用意して下さい。
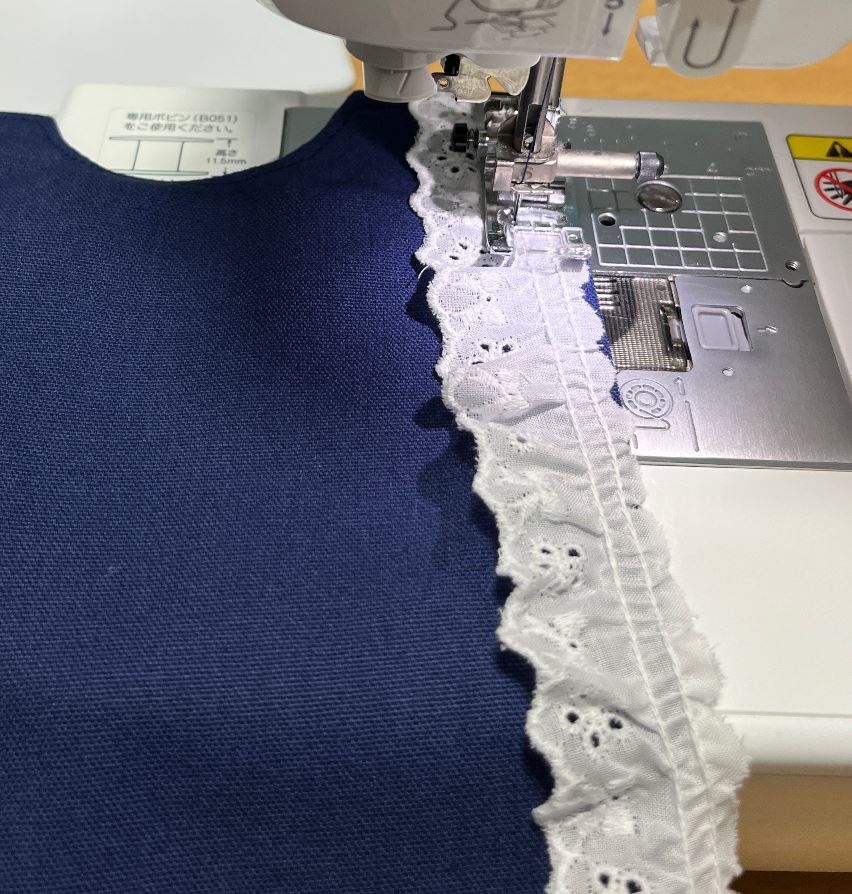
スカートすそとレースを中表にして端から1cmで縫い合わせます。
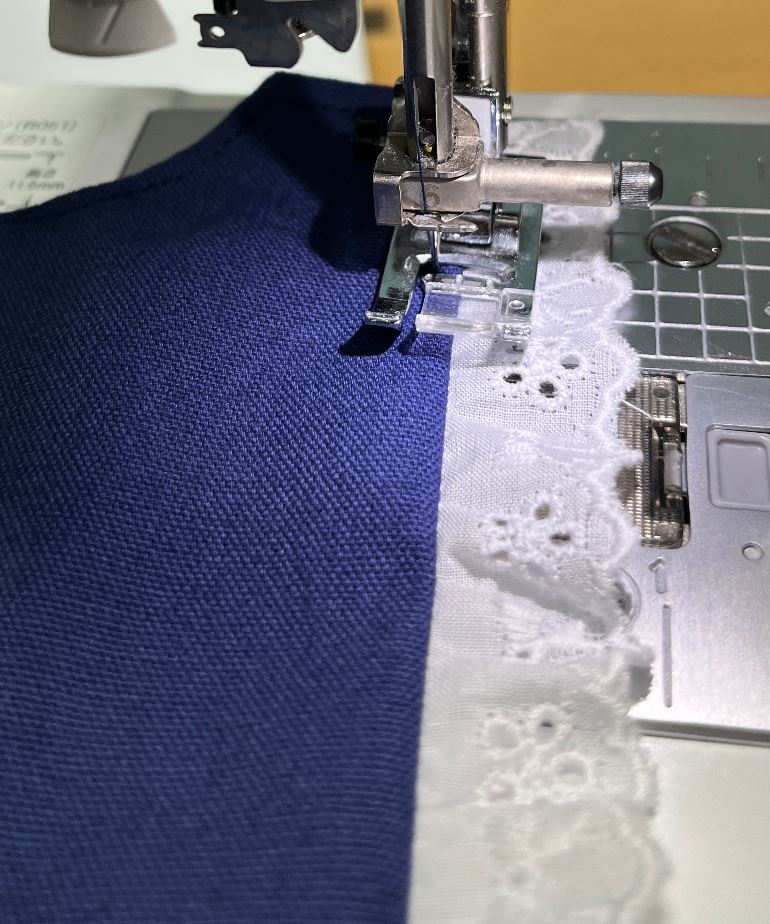
レースを表に返してアイロンをし、端から3mm程度でミシンを掛けます。
ギャザーを寄せる
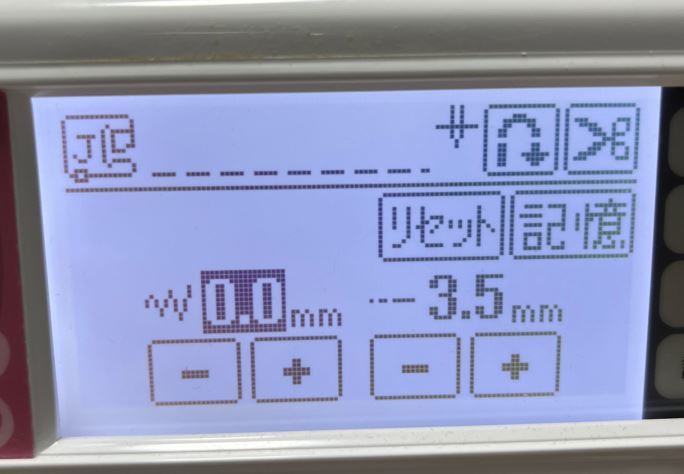
ここからは従来のパフスリーブワンピースと同じです。
ミシンのあらさを+1mmにして…
いろいろやると…
完成!!
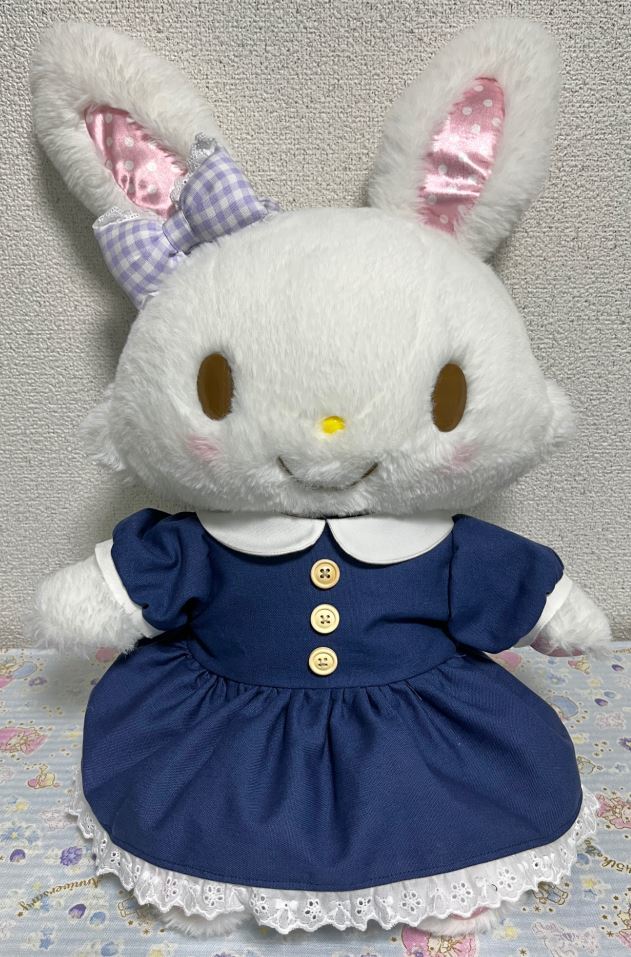
紺色ワンピースの完成です。
この色のパフスリーブワンピースは私のトレードマークだと勝手に思ってます。
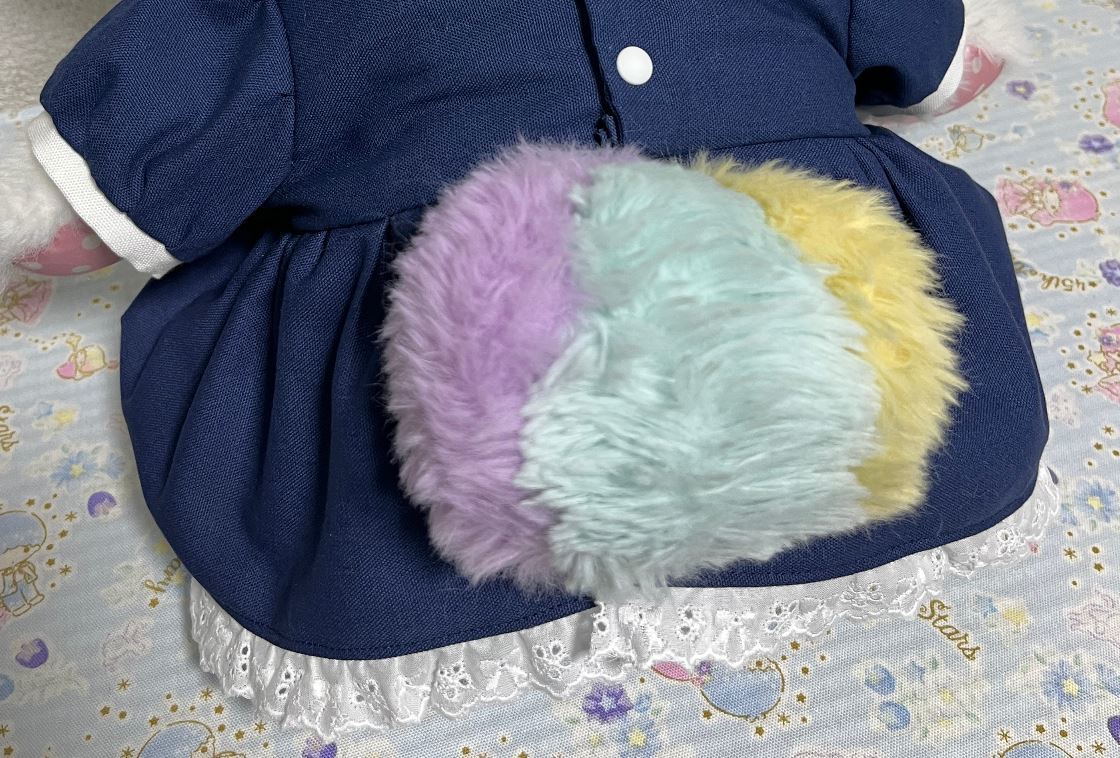
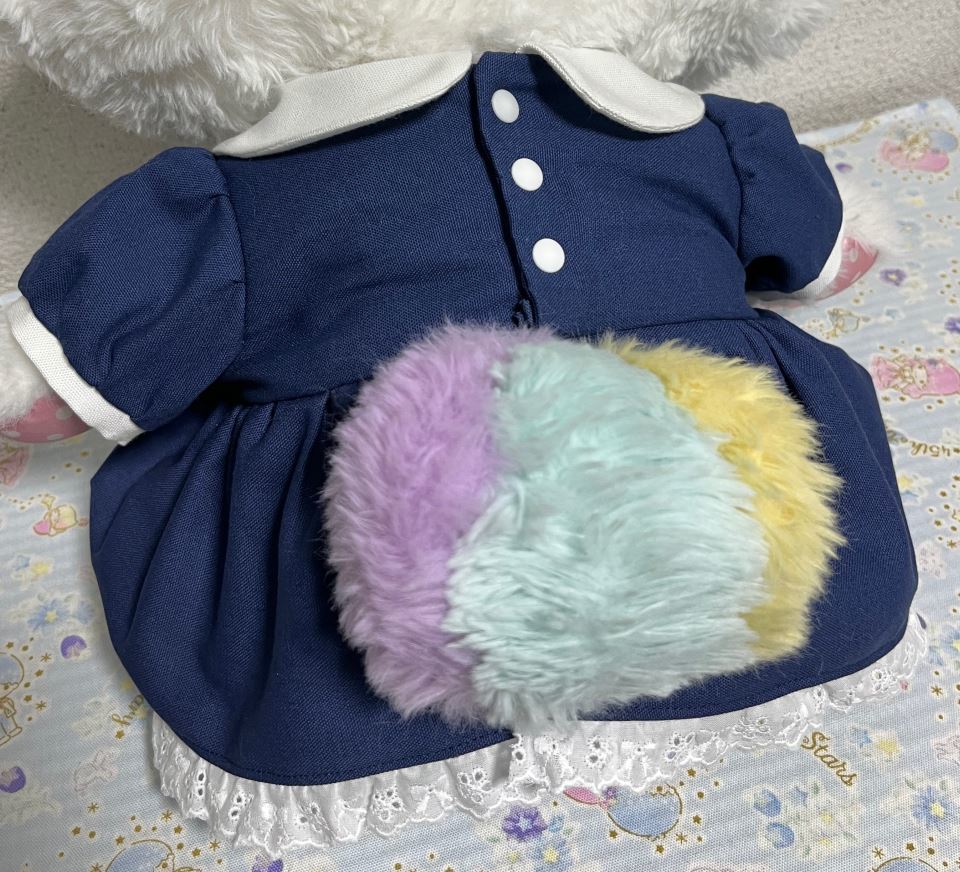
後ろです。
しっぽが出ます。
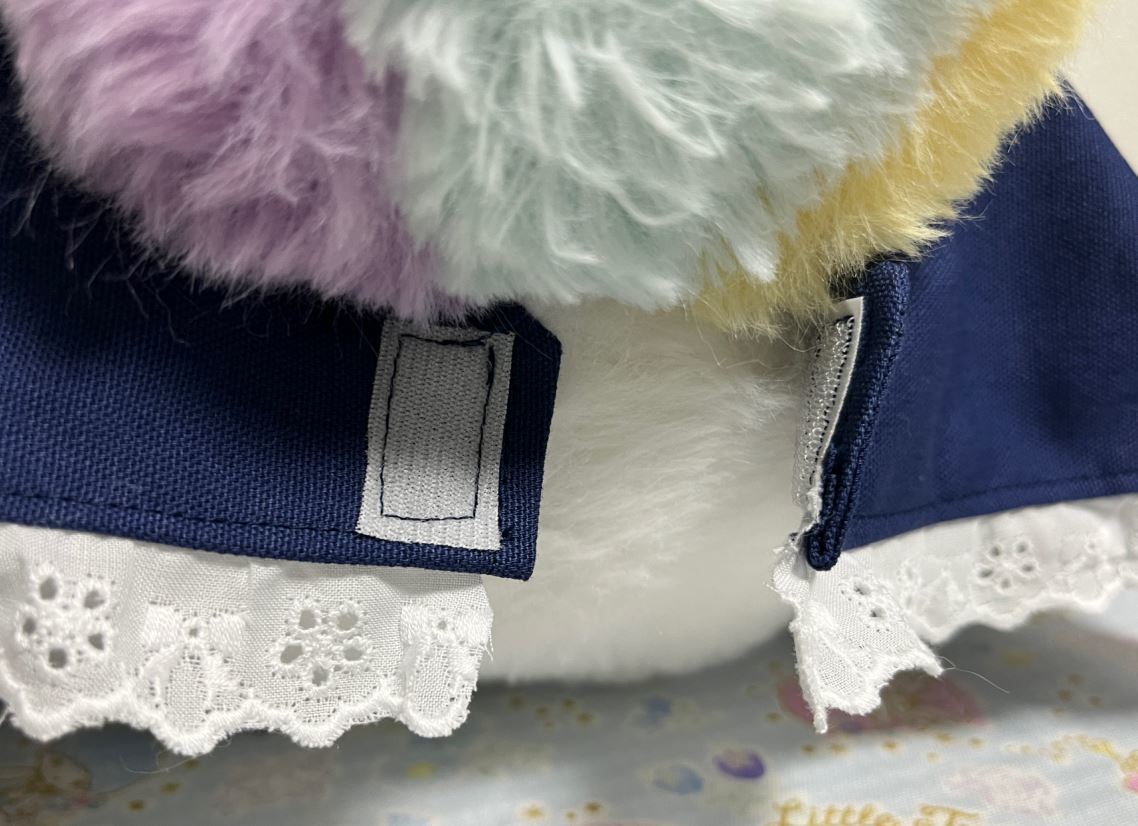
スカートすそはマジックテープで開閉するようにしています。
ウエスト部分(しっぽの上)にもマジックテープを付けてみましたがなくても着せた感じが変わらなかったのでなくてOKです。
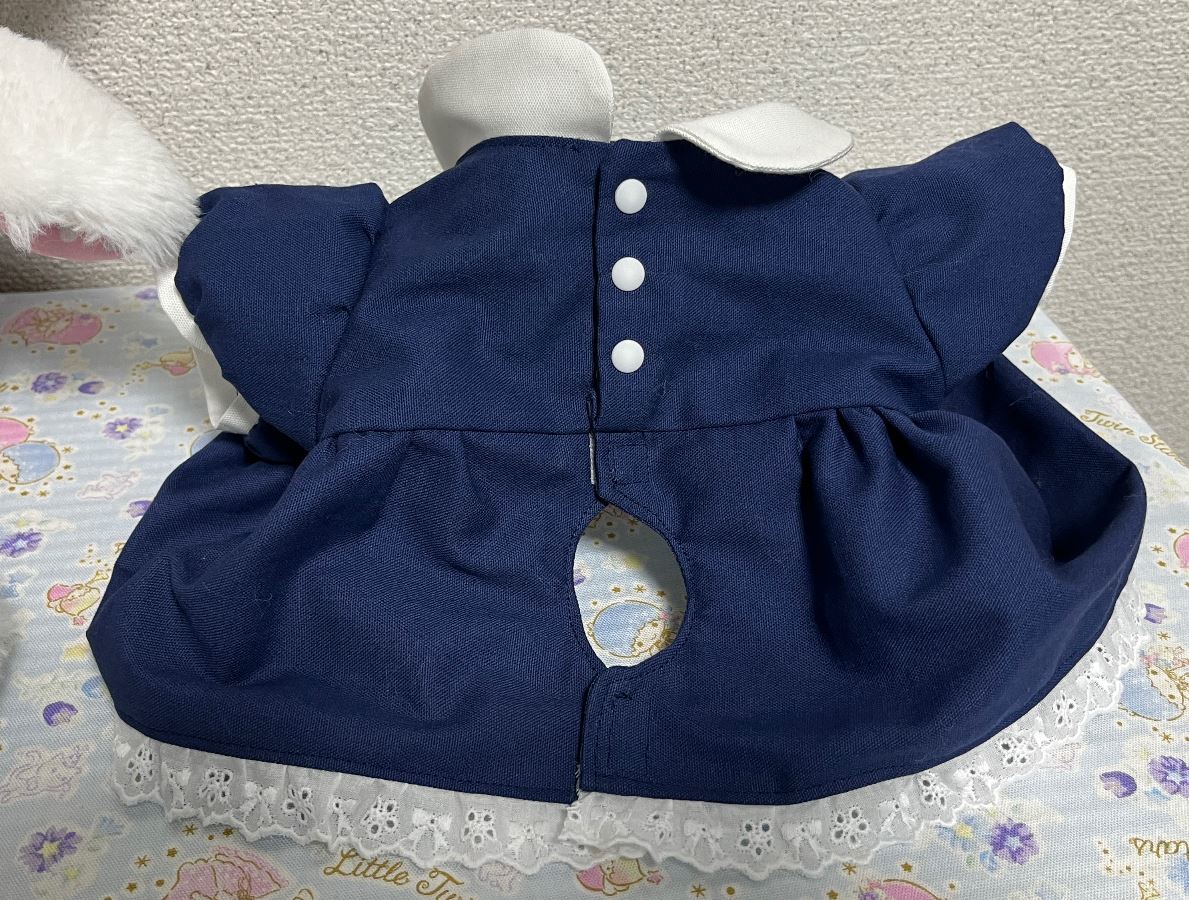
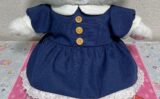
服だけ見るとこうなります。
しっぽ穴は見返しで処理しているので綺麗に仕上がります。
コメント